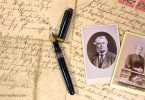
Keeping all of your genealogy research from becoming one confusing jumble may seem like a daunting task, particularly when you are first starting out and gathering lots of new information. The good news is that it does not have to be this way. There are some simple tried and true methods of organizing your genealogy, so what you are looking for is always right at your fingertips. With these tips, you will never have to wonder about where a certain document is anymore.
Here are the best tips to follow to keep your genealogy research papers organized.
Buy a Three-Ring Binder for Each Individual Family Surname in Your Tree
Using a label maker or a printer, print out a front and spine cover or label for the binder with the surname on it. This will make it easy to find on a bookshelf. Buy archival-safe plastic sheet protectors as often as needed to keep all of your documents in order, and safe for future generations.
Arrange Documents in Each Binder by Type and in Chronological Order
This makes it super easy to find what you are looking for with each individual family. You never know when you will need a particular document to show a relative, apply for a lineage society, or to refer to it in your genealogy research.
Simply arrange your documents in each individual binder by categories, such as birth records, death records, marriage records, newspaper articles, graduation papers, military records, wills, old photos, and such. Then, within each category, arrange the individual documents into chronological order. A piece of paper separating and naming the categories is optional, but helpful.
Label Documents that are Not Obvious
If a document isn’t something like a vital record, where it is obvious what it is and from whence it came, label the document. You can do this by affixing it to archival-safe linen paper with double-stick tape, and either writing, printing, or sticking a label underneath it or above it on the paper. If the paper is large enough, you may be able to fit and label two, or even three small documents to it. If there is no room to label a document on the front of the paper, use the back of the paper to label it.
Arrange Binders Alphabetically on Your Bookshelf
This just makes the family you are looking for that much easier to find. If you discover that you are acquiring too many new genealogical documents for a particular family for them to fit into one binder, then purchase a new binder and label it for that family, and as Volume II (and even III and IV, if you need the space).
Make a Table of Contents for Each Binder
You can do this by printing one on your computer. It is totally optional and will need to be updated as you add new documents to the binder, but it is a nice touch that will help other researchers in the future use your binders more easily.


